Contents:
1. "Fill Pattern" feature for custom text layers
2. Connecting an option with the "Image Thumbnails" option type to the layer
3. Connecting clearing rules in case both "Color Thumbnails" and "Image Thumbnails" options are available to the customers
Related Articles:
- Customization - Static Area For Monograms & Text: Multi font family / color / size selector for users. Charge per character feature. Glow effect
- Texture on custom text
If you would like to add only one particular pattern/texture, please refer to the Texture on custom text Guide
This guide shows how to let you customers select a pattern/ texture from a pre-uploaded library.
If you haven't created a text layer yet, please check this guide at first.
1. Let's start with creating a library of images that a customer will be able select for text colorization. Images uploaded in this option will serve as a source for filling the text with pattern. First of all, we need to create a "Single Choice" - "Image Thumbnails" option type.
*click on the images to open in new tab
2. Create the required number of choices. For each choice, upload 2 images: one image will show up as a thumbnail on the storefront, and another one will be used as the pattern source.
3. Create a new custom layer
- If you already have another text layer that is colorized from the "Color Thumbnails" option type, just copy already existing layer as shown below. Please refer to this article for more information.
- If you need only pattern colorization, then create a new layer.
4. Color settings.
- If you copied an already existing layer, disable colorization from a custom option. To do this, follow the instructions below:
-
Layer Settings
-
Color Settings
-
"Font Color From Custom Option" - DISABLE
- If you created a new layer, skip this step
5. Open "Additional Settings" and enable the "Fill Pattern Image" feature 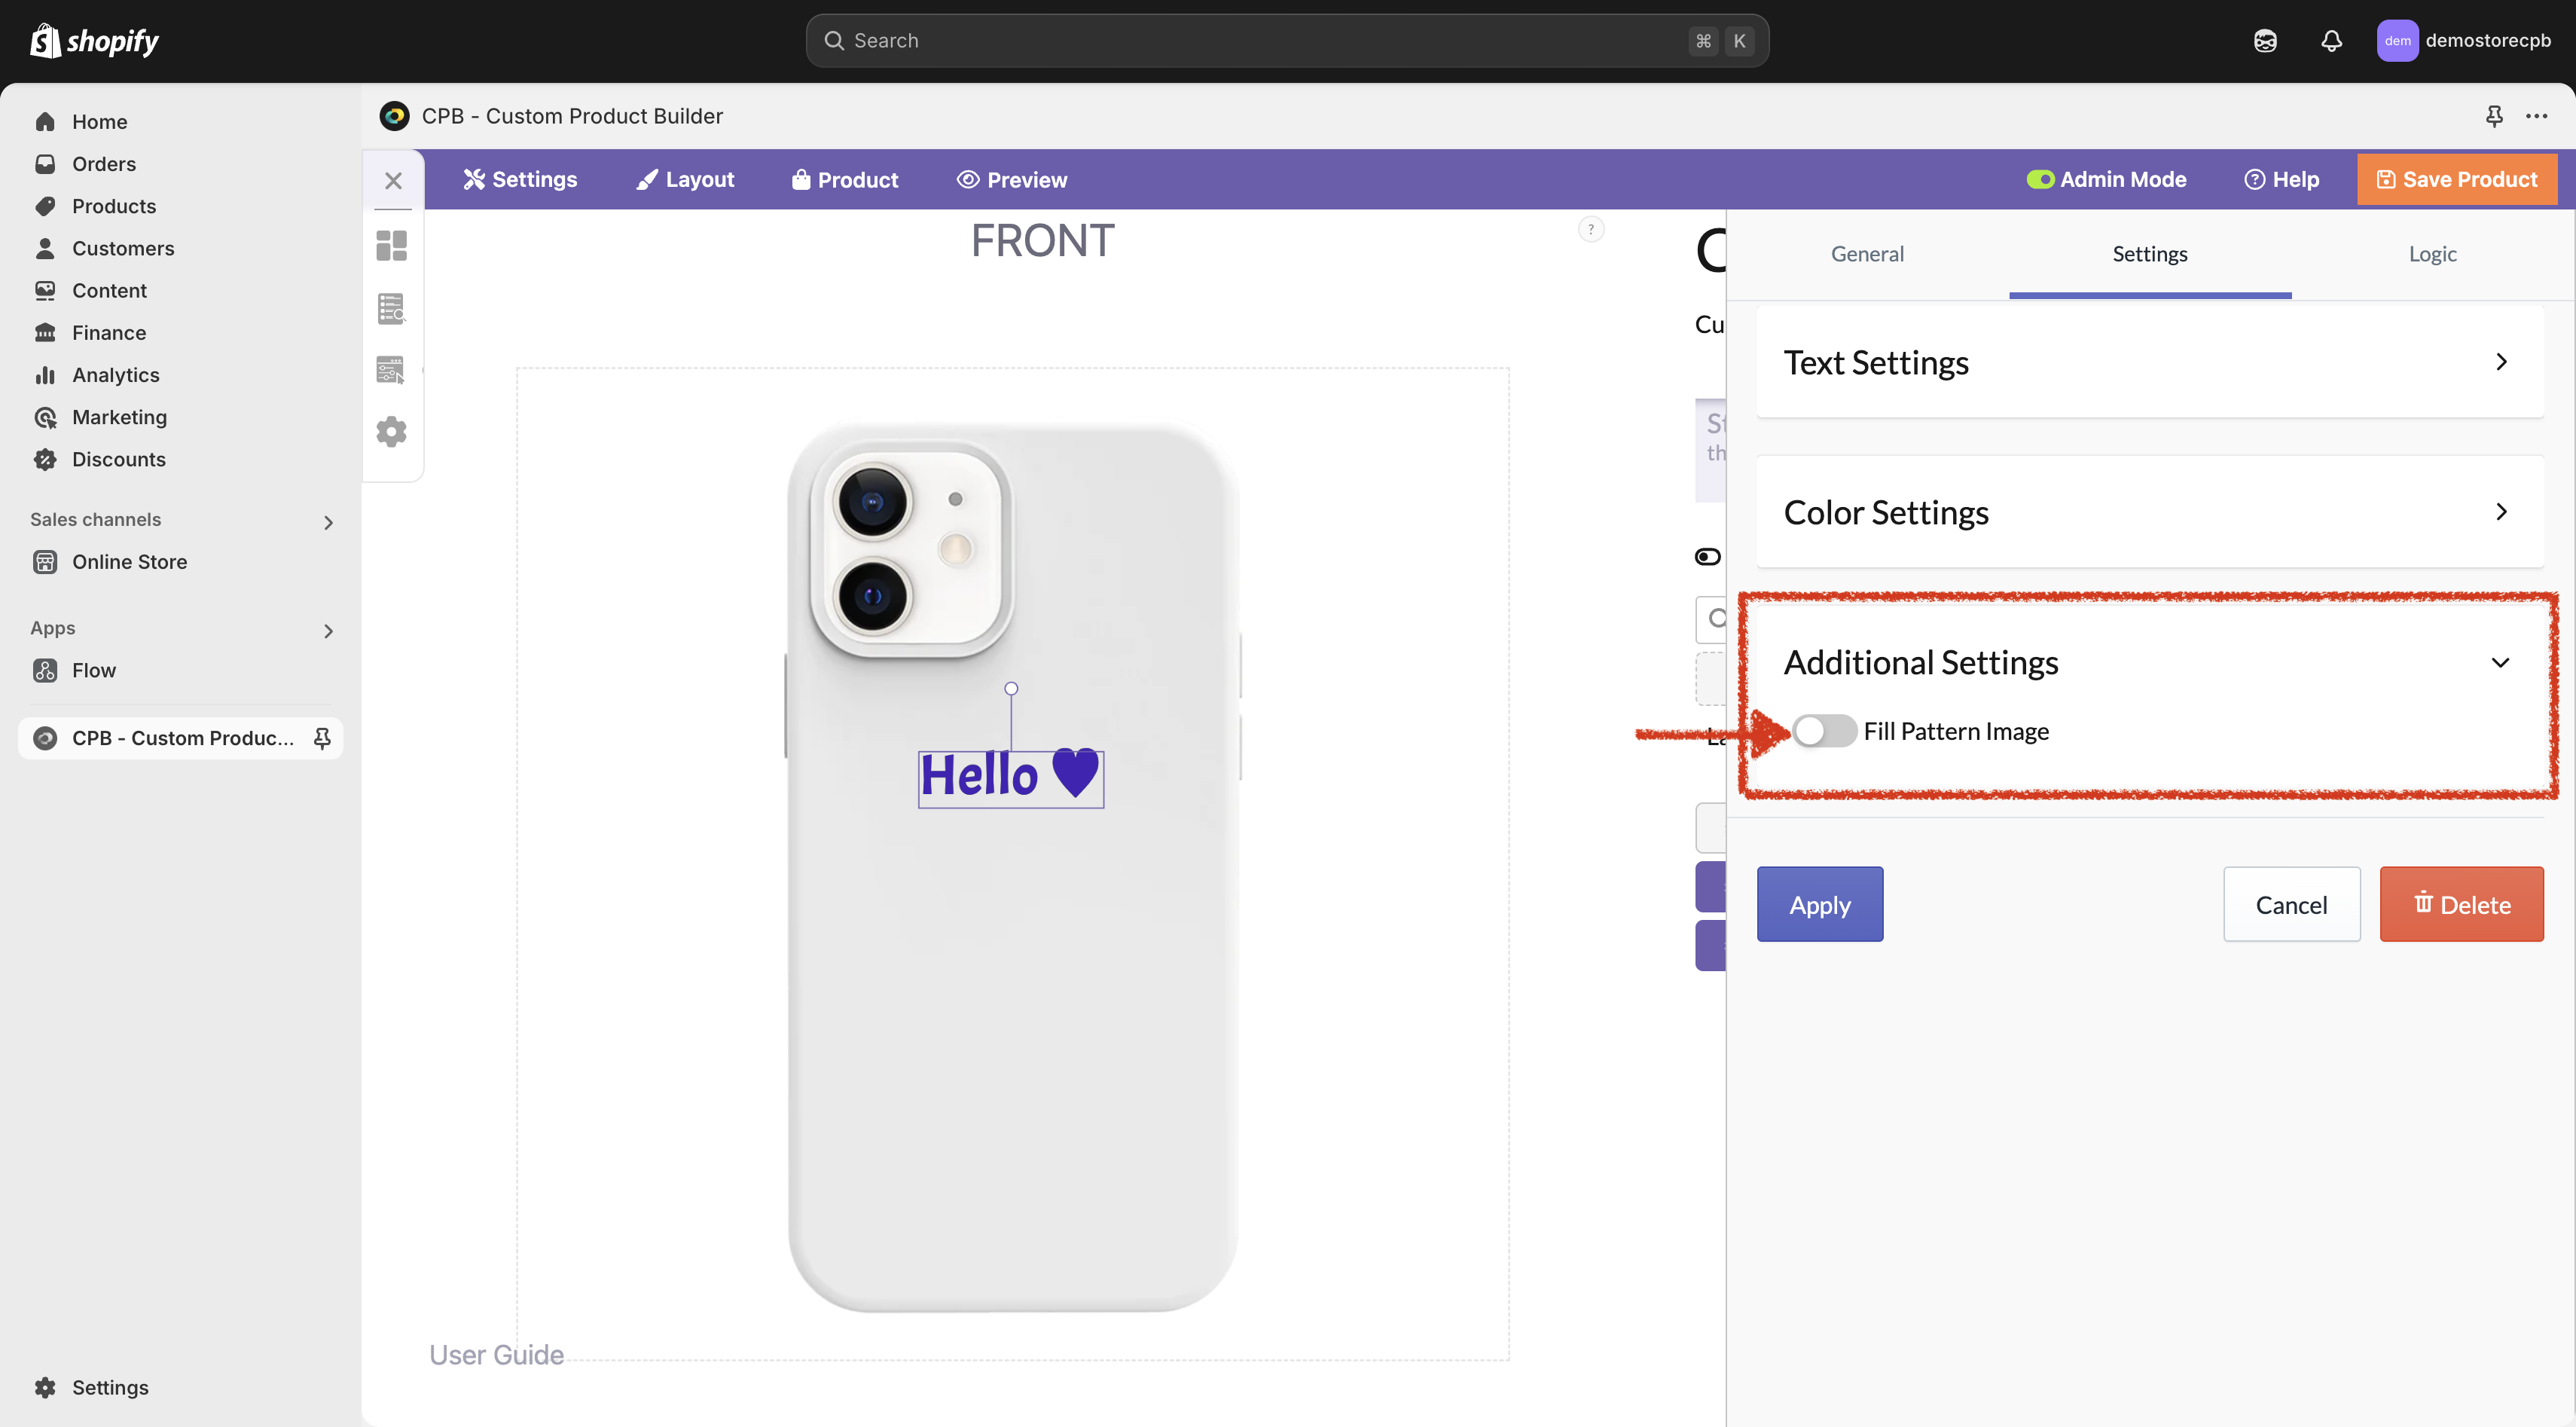
6. Select "Apply Patterns From Step -> Custom Option -> Image Thumbnail Type -> Choice Views"
And set the pattern source.
7. Set the position that fits the layer best. You can rotate and scale the image to make sure that patterns are displayed correctly.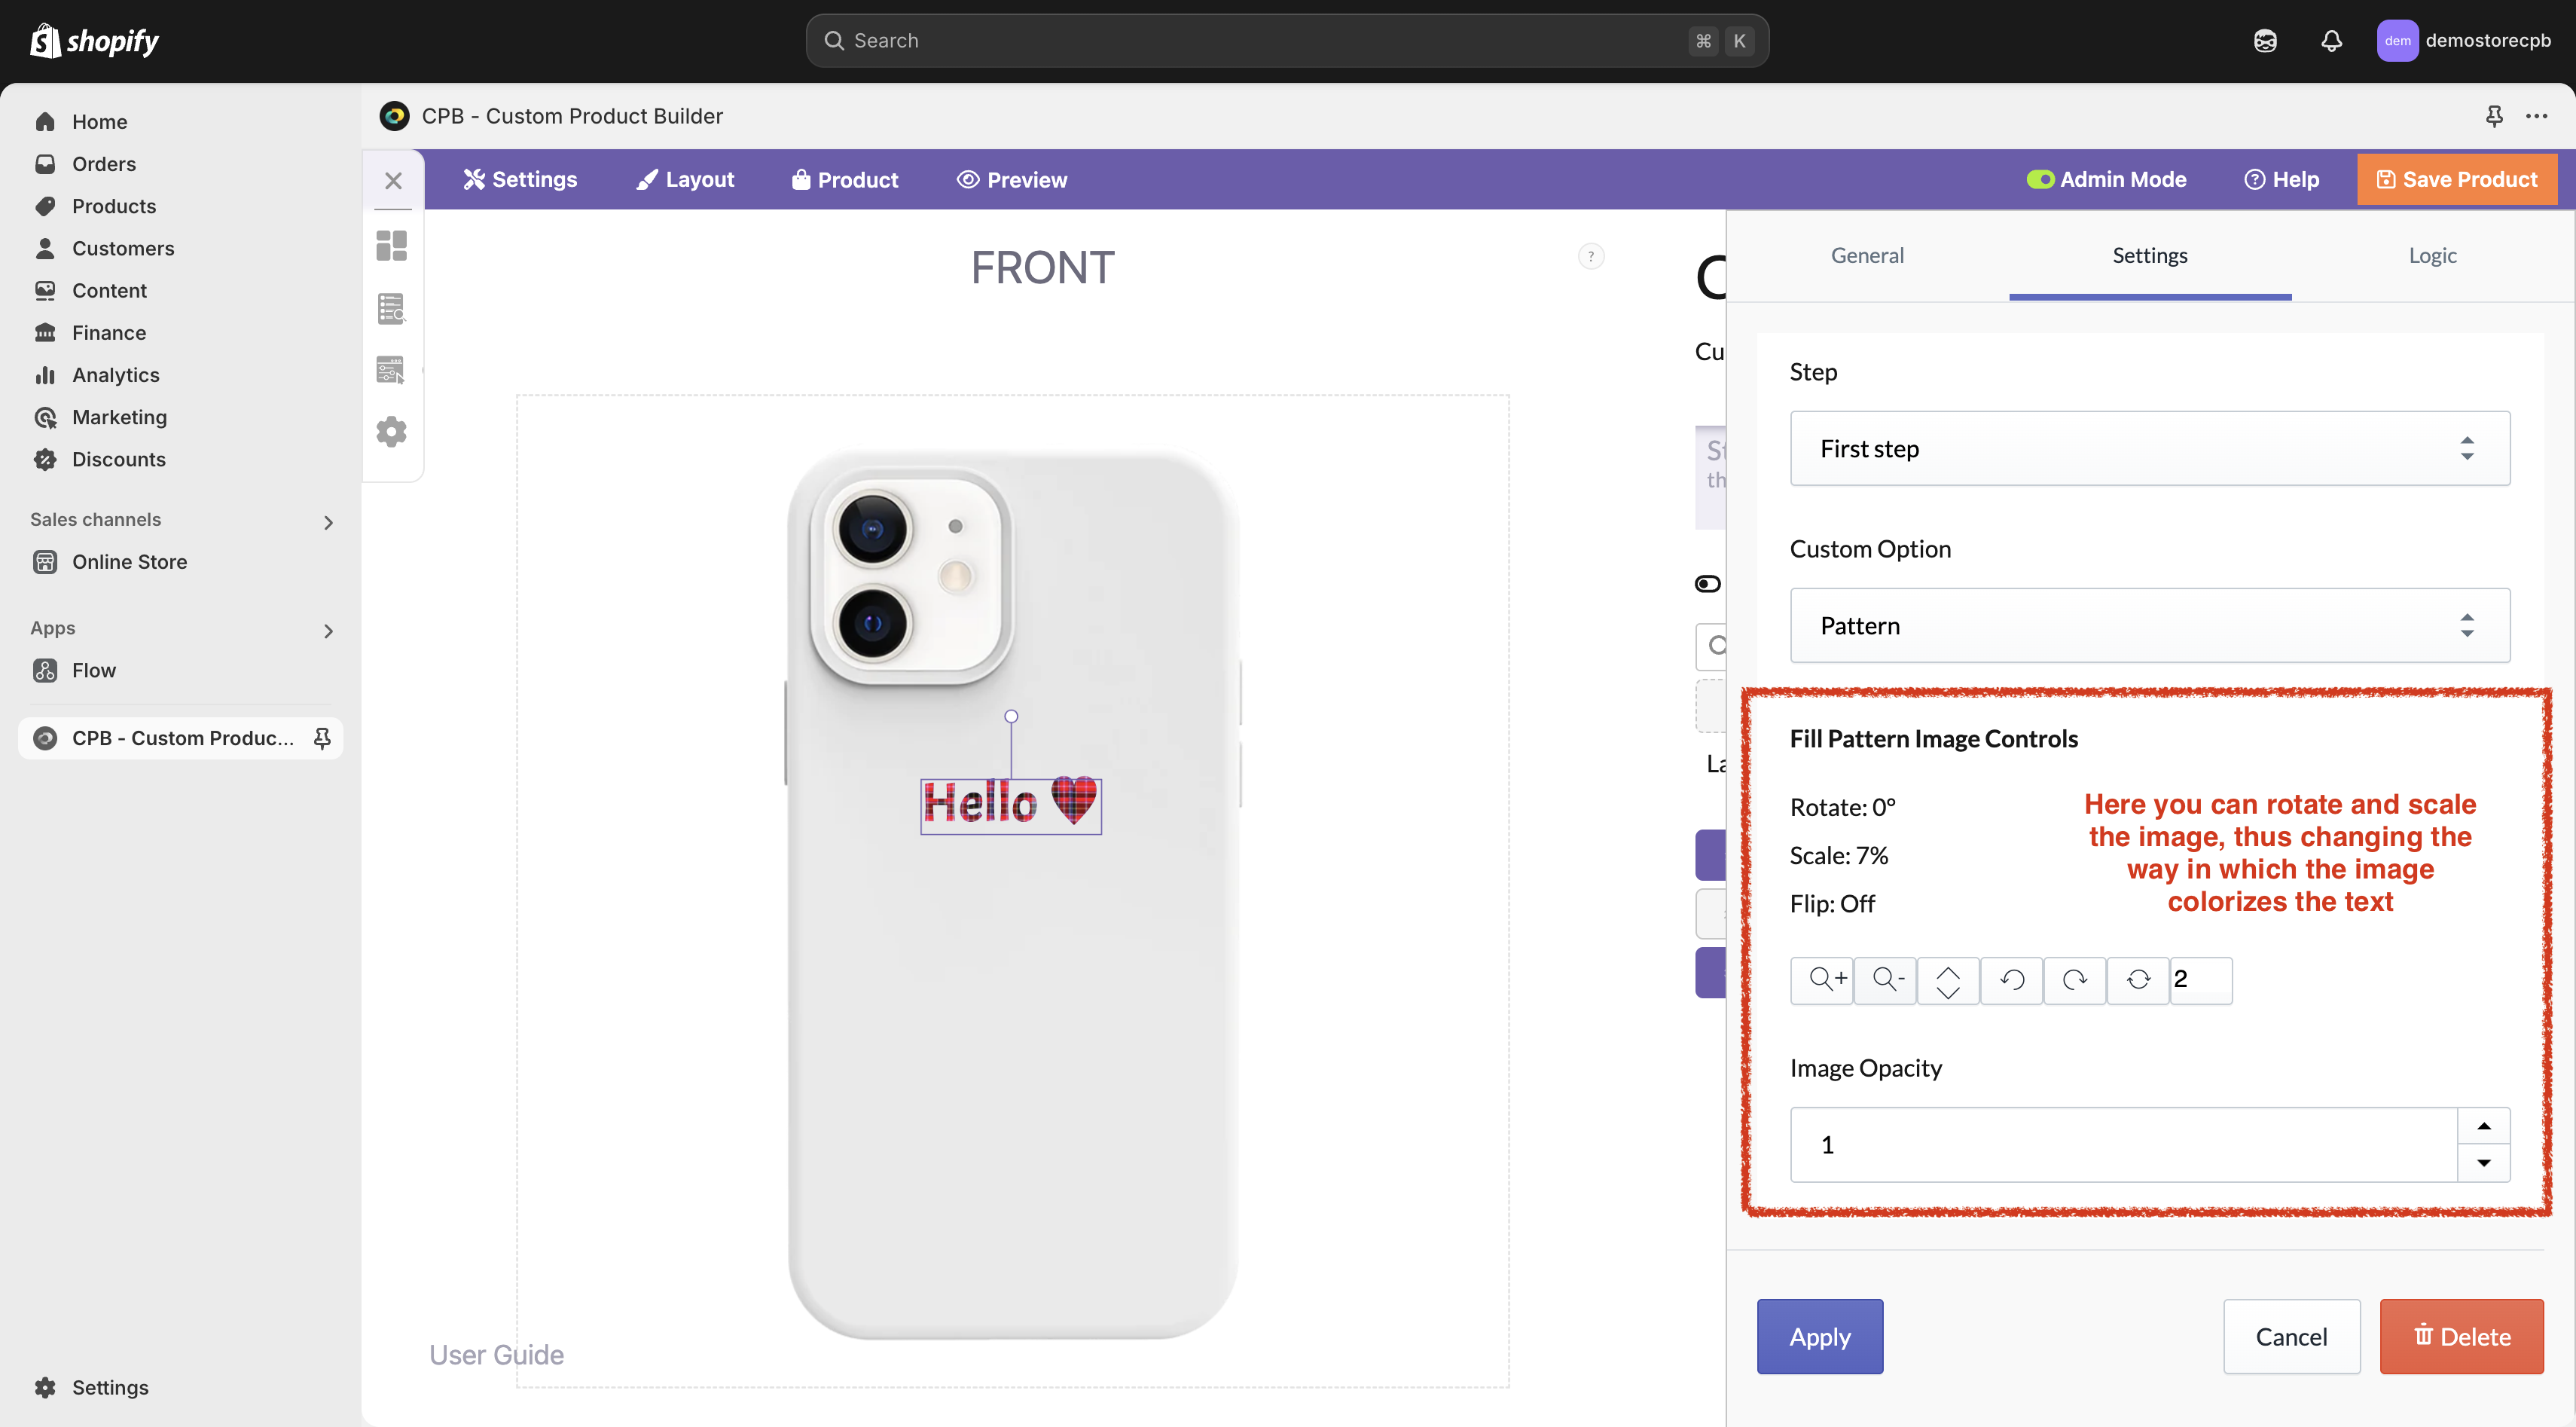
8. Setting clearing rules.
This step is necessary if you are using both simple text colorization and pattern colorization.
If you have only one layer, you do not need to follow further steps.
Now we need to make sure that the correct colorization effect is displayed on the preview. If we use both "Color Thumbnails" and "Image Thumbnails" options, we need to connect Clearing Rules.
To do that, click the edit button next to the option with the "Image Thumbnails" type. In our case, it is the "Pattern" option:
Since "Pattern" is the last option in this step, we need to make it work in a way that it clears previous color selections. That is why for this option we need to apply clearing rules for previously selected options as shown below:
As the "Color Thumbnails" option is placed before the "Image Thumbnails" (Pattern) option, we need to clear all the following selections. To do that, click the edit button and select "Clear All Subsequent Selected Custom Options In - This step":
The last thing we need to do is to make sure that all the other options are not affected by these rules. For that, put the "Do Not Apply Clearing Rules To This Custom Option" checkmark to the other options as shown below:
Now you are ready to use this feature with your products!
Comments
0 comments
Please sign in to leave a comment.